Showing posts with label Army Life. Show all posts

Tuesday, July 22, 2014

DIY Travel Map and Poster Frame with a Natural Stain - Deutsch style

If you love to travel and explore, then a push-pin travel map will complete you.  Ours is located in the dining room, and I can't tell you how many times we've spent the whole dinner conversation discussing our past and future travels or just in general where certain countries are located (geography just isn't my thing).  A travel map is a great way to see where your feet have touched this vast Earth.  It also helps to realize how much of the World you haven't seen and how large it actually is.  We are so blessed to be stationed in Germany during this time in our lives and have the opportunity to visit such amazing places in a short amount of time.  We also have the travel bug and have made a marriage pact that we will travel when we move back to the States. We're a bit embarrassed to admit that we haven't seen some of the greatest places in the USA (Boston, New Orleans, Maine, and Portland to name a few).  


I searched the internet for a push pin travel map to buy and found one from National Geographic, but since I have so much time on my hands and love DIY, I thought I'd attempt making one myself.  If you don't have the time and want a professional looking map the National Geographic one is a great option.   If you want to make a map that is unique to your family, I found some great tutorials on how to make one yourself.  I had been contemplating following the tutorials and purchasing my map online, when Sam saw the perfect map in a local store here in Germany, NANU-NANA.  I fell in love with it when I realized that the countries were all in German (It also helped that it was 6 Euro, score)!  One of my favorite parts of Deutsch class was learning the different spelling of other countries, like Jamika, Island, and Kanada.  What a great souvenir to take back with us after our tour is over!  If a Deutsch map isn't for you, you'll surely find one on amazon that suits your family.  


The world

I heart Deutsch

I have to warn you that this tutorial has several parts:  How to make a travel map, a DIY poster frame, and how to stain the frame with household items.  If you're still in, then here we go....

Turns out there are a lot of DIY travel map tutorials out there on the interwebs (shocker, I know).  I used this tutorial to make mine.  She was working with the same type of glossy poster that I worked with, and I was happy to see that the Mod Podge Matte (not glossy) gave it an antique look.  Mod Podge is a bit tricky to work with, but don't be discouraged.  Your map will bubble during the process, so don't freak out and trash your map in frustration while proclaiming you are giving up DIY forever (been there, done that - with another project).  I have my pictures below of the before and after.  If you don't have a sheet of cork board like the tutorial above, I ended up using square cork board pieces instead and it worked out great.  


Adhering your map to cork board:

**Step 1**
Get a piece of cardboard, thick foam board, or plywood to use as a backing.  I ended up using an old moving box, since this is going to be hung on the wall (a piece of plywood might be too heavy and a moving box is free).  Glue your cork board squares (I found some at the PX) to the cardboard.  I used regular old white glue they use in grade school.  I was nervous the lines from the squares would show through, so I made sure to get them as close as possible to each other.  

**Step 2**
Put Mod Podge on the cork board.  It will start to soak into the cork, and you want it to feel a bit tacky before laying your map down.  Try to lay your map in the right place on the first try, and don't try to re-situate the map if you see bubbles, they're inevitable and will go away after it dries and sets completely (up to 48 hours).  Next apply two coats of Mod Podge on top of the map, allowing it to dry in between each coat (30 mins to 1 hour).


Ahhh, Bubbles!!! 
  
1 hour layer -  Breathe easy...the bubbles are slowly going away ;)

Here is the final map.  See, the bubbles are gone!  There are a few creases, but I think if I would have not skimped on the Mod Podge or tried to pull my map up because I didn't lay it down in the right place, it would have had less creases.  Honestly, I think that the creases from the bubbles actually help add to the antique character of this map.  I also like the effect that the Mod Podge Matte gives my map.  The glossiness of the original poster made it look less antique.  All wins in my book!


Next you can take this in to your local frame shop (Hobby Lobby in the States or the Art's and craft Center on post in Germany).  Actually, the frame shop on post will mount it to cork board and frame it for you if you aren't that in to DIY.  Don't bother looking for a frame on the German economy.  I searched high and low for a decorative poster frame with no luck. OBI and Hornbach all had poster frames that were thin and cheap looking, while Ikea just didn't carry the normal 24 x 36 poster frame size.  I was dying for a Target at this point because they have some great options at reasonable prices.  Recently I found out about the store Globus here in Germany, which is supposed to be the closest thing to a Target...I can't wait to check it out!  Maybe you'll have luck there?  In the end I'm glad that I didn't go that route because I came across a great tutorial on making your own poster frame out of 1 by 4's, and it goes great with the antique look I was going for with my map.


Making a wood poster frame:


**Step 1**
I went to Hornbach (for those of you who live in Germany) and they were nice enough to cut the wood for me in the correct dimensions for a 24 x 36 poster (2 pieces of wood at 42 inches and 2 pieces of wood at 23.5 inches).  Side note:  make sure to not be overwhelmed by being a female in the hardware store in Germany and pick the first board you see that happens to be warped...it leads to problems.  My father taught me better than that, but I couldn't muster up the courage to ask for a different one when I noticed it as the guy was hand sawing the board because the electric saw machine was down. It's okay, more of a challenge, right?

**Step 2**
Once you have your pieces find some hardware to attach the boards together and you have a frame!  Too easy peasy, right?  


Hardware

Obviously, you can go and buy any stain at your local hardware store if you want to take the easy way out (or if you're smart). I wanted to make this an epic DIY project, so I went ahead and tried the tea staining process. The tea stain was gorgeous, but unfortunately the stain matched the color of my map. Through searching endless DIY stain tutorials I found out that soaking steel wool in vinegar for 24 hours brings out the tannins in the tea, and creates a much darker stain.  This tutorial shows how different woods react to the stains.   I'm not sure on the type of wood I found here in Germany, but my experience is below.  

Staining your wood poster frame:

**Step 1**
Take 3 black tea bags and 3 cups of water; Boil it and reduce it to 1/2 a cup.  This will be a thick consistency.  I applied four coats.  I let the wood dry in between, so it wouldn't get soggy.  Make sure to let the stain sit overnight to let the full color show, and then decide if you need to darken it more with a steel wool vinegar stain.  

**Step 2**
Take steel wool (grade #0000) and break it up into pieces.  Place it into a glass jar and cover the steel wool with vinegar (1/2 and inch to an inch).  I used regular household vinegar.  Let it sit 24 hours.  I just set the lid of the jar on the top of the jar and set it in a well ventilated area near a window.  I could't wait 24 hours and tried it after 12 hours.  The one coat didn't stain it dark enough, so  I did another coat after letting the steel wool vinegar sit for a full 24 hours.  It darkened the wood much more and came out gorgeous!  Moral of the story, be patient and follow your tutorial (when will I learn?).

**Step 3**  Add a coat of stain wood sealant or top coat in matte.  I'm not actually sure what I bought at the German hardware store, but I loved how it came out!
Black tea stain
Top LT: Pre-stained wood; Top RT: Four coats of black tea stain;
Bottom LT: One coat of steel wool vinegar stain (12 hours); Bottom RT: Two coats of steel wool vinegar stain (24 hours)

My German sealant or top coat

Attaching your frame to your map and hanging:

**Step 1**
Lay your stained frame face down and position your map, that's attached to your cork board-cardboard creation, so it is centered.  Grab some small nails and secure the map to the frame.  We did one every 6 inches or so.  

**Step 2**
Find some picture hanging hardware and add it to the frame.  I used two pieces of hardware, since it's a large frame.  

My favorite helpers!  Emma says we're all work and no play.

Picture frame hardware
Pinning scheme:

I found pins on amazon, here.  These 1/8 inch map tacks are shorter in length than sewing pins and have a small diameter.  They come in all colors, and they shipped to our APO address within a week (I was dying to start pinning, so this made me happy)!  I chose gray, chocolate, and brown to go with my antique style of the map.  

Choose a pinning scheme that works for your family.  We chose a color for where we've lived together (the Army likes us to have several places we call home), where we've traveled together, and where we've traveled apart (we couldn't leave out Sam living in the sand for 9 months and our map looked like we had never visited the major cities in the USA even though we had both traveled to them, just not together).  


North America


Europe


One last thing that would be a nice addition, is a legend describing what the pin colors represent.  I haven't fully committed to this idea yet because should it be in German to keep with the theme of the map or in English, so our friends can actually read it?  If you decide to add one, it would be super easy.  Just find the right paper to match your map and use Mod Podge to adhere it. You could use a font that matches your map and say, "The ____ Family Travels"  and below have your pinning scheme, "Where we've lived together, Where we've traveled together, Where we've traveled apart."  Then stick the correct colored pin next to the description.  Until I find the perfect paper and decide which language to use...

Voila!  Or "hier" if we're sticking with our German theme (not fancy enough though, right?).  A perfect addition to our home.  


Zum Wohl!

Thursday, April 24, 2014

Europe's Military Officer's Ball

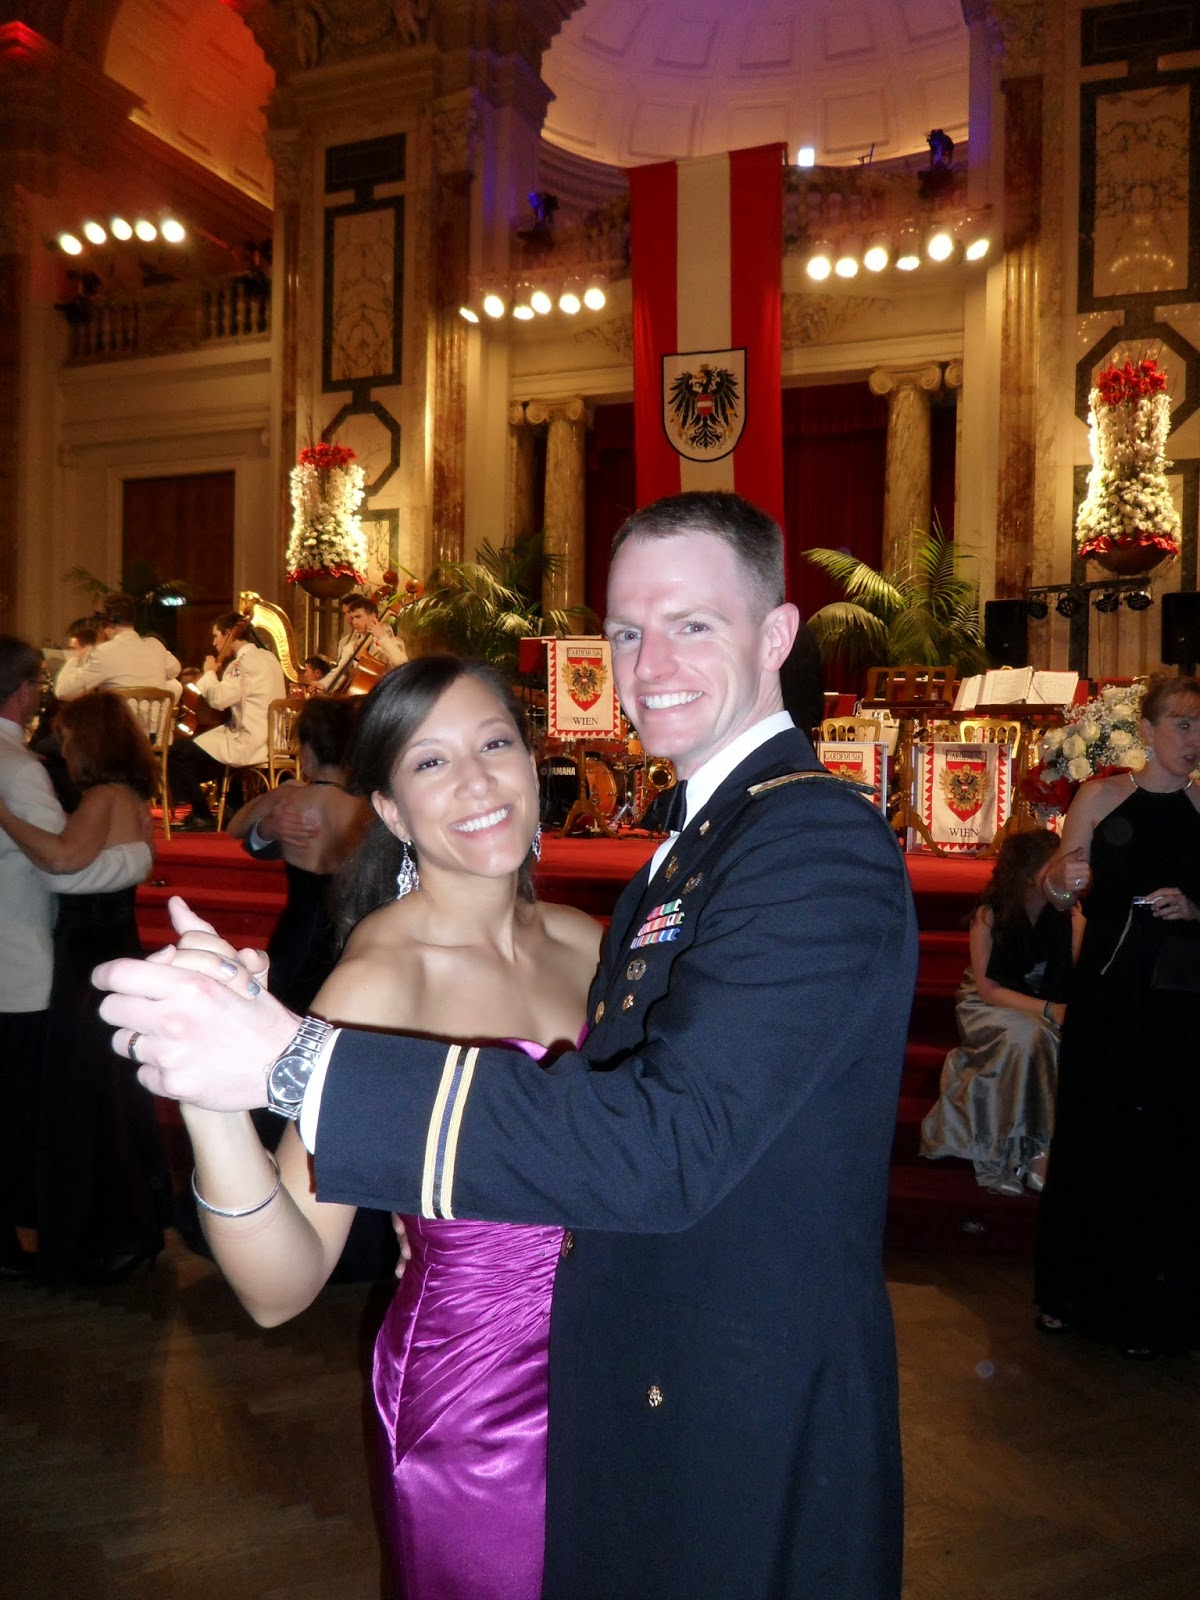
This is a must do if you are stationed in Europe.  Every January Austria puts on a ball for all officer service members from countries that they have partnerships with called the Ball der Offiziere.  It's a great way to see the lovely city of Vienna and get a ticket to one of the 400 balls that occur in this city between New Year's Eve and Mardi Gras.  Not to mention that you get to dance in one of the premier estates, Hofburg Palace.  We enjoyed learning how to waltz (i.e., faking it by spinning in circles) and feeling like royalty for the night under crystal chandeliers.  This city is rich in history and culture and even holds the second best palaces in the world, Shonbrunn Palace.  Similar to the Palace of Versailles.  I had no real expectations for this city when we booked our trip, and by the time we left I had fallen in love with it.  I hope to go back in the summer to see the gorgeous flowers.  

My only real expectation for Vienna...


Looks like fun, right?
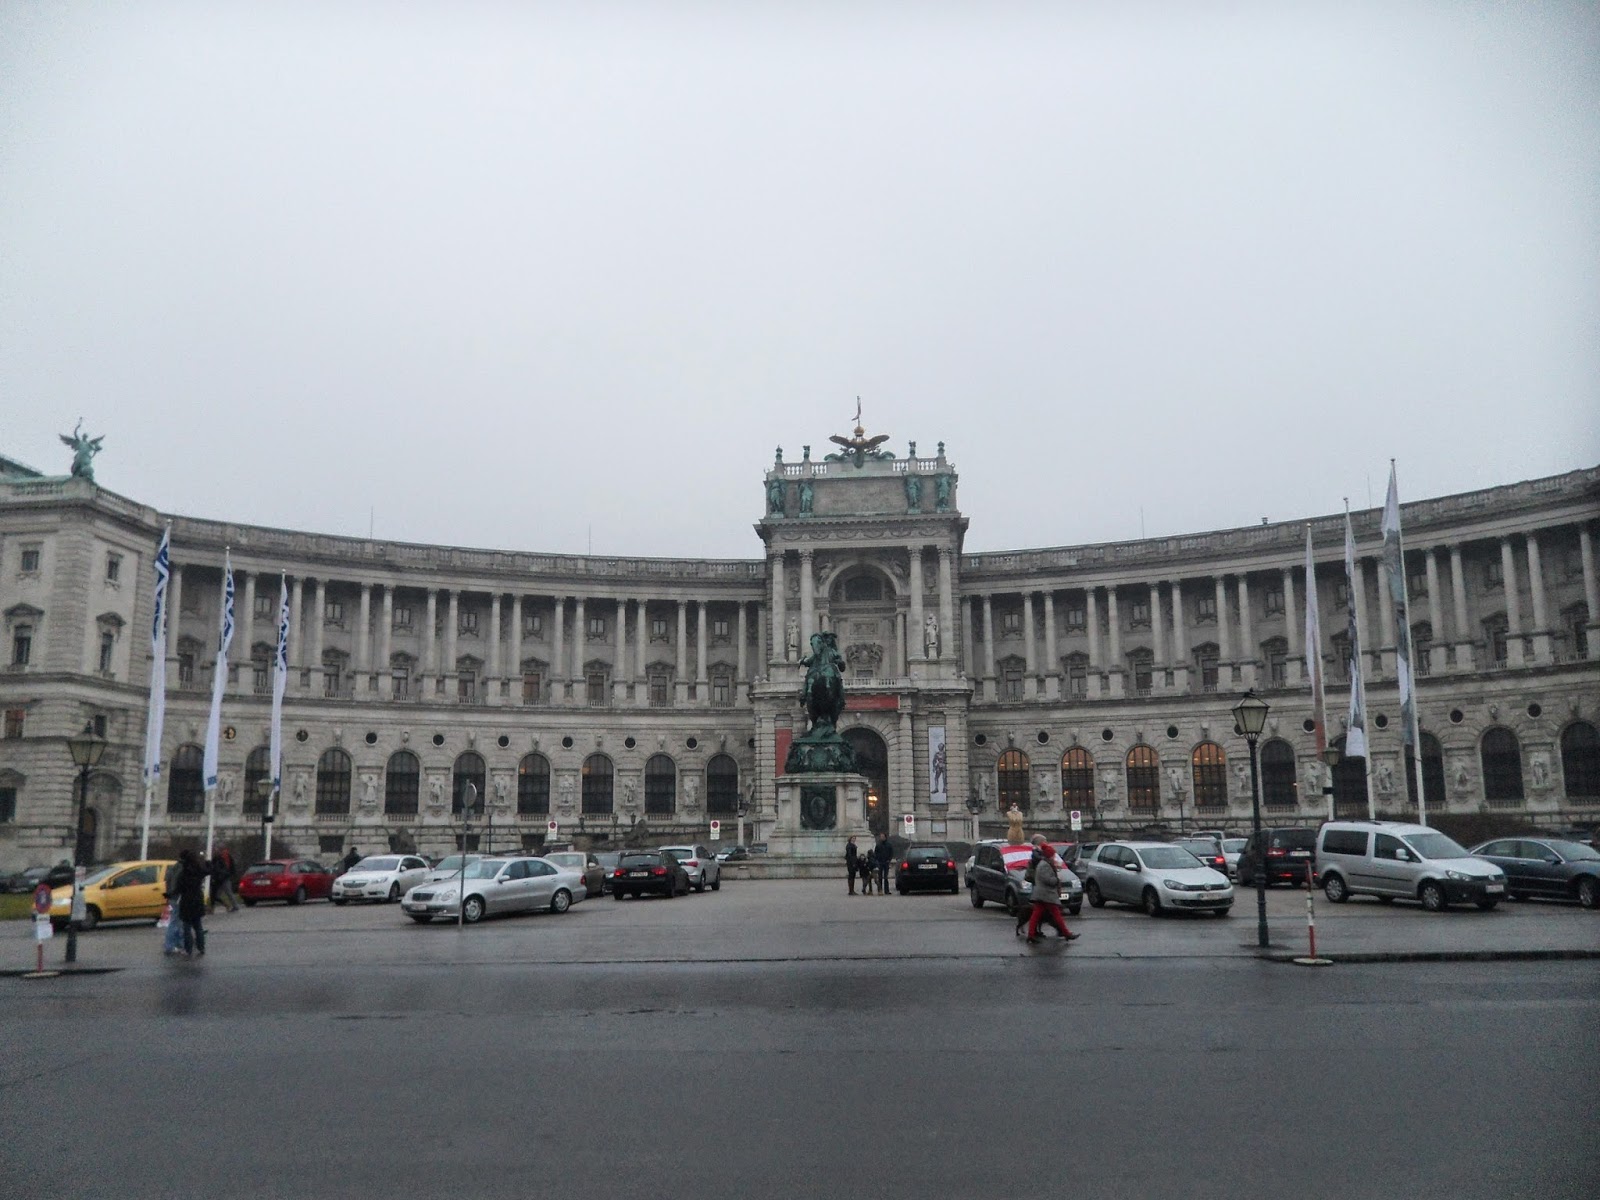
Hofburg Palace - Where the ball is held

Rear view of Hofburg Palace


My first dress bought on the German economy at Hochzeitshaus Wiesbaden


Gorgeous ceilings 


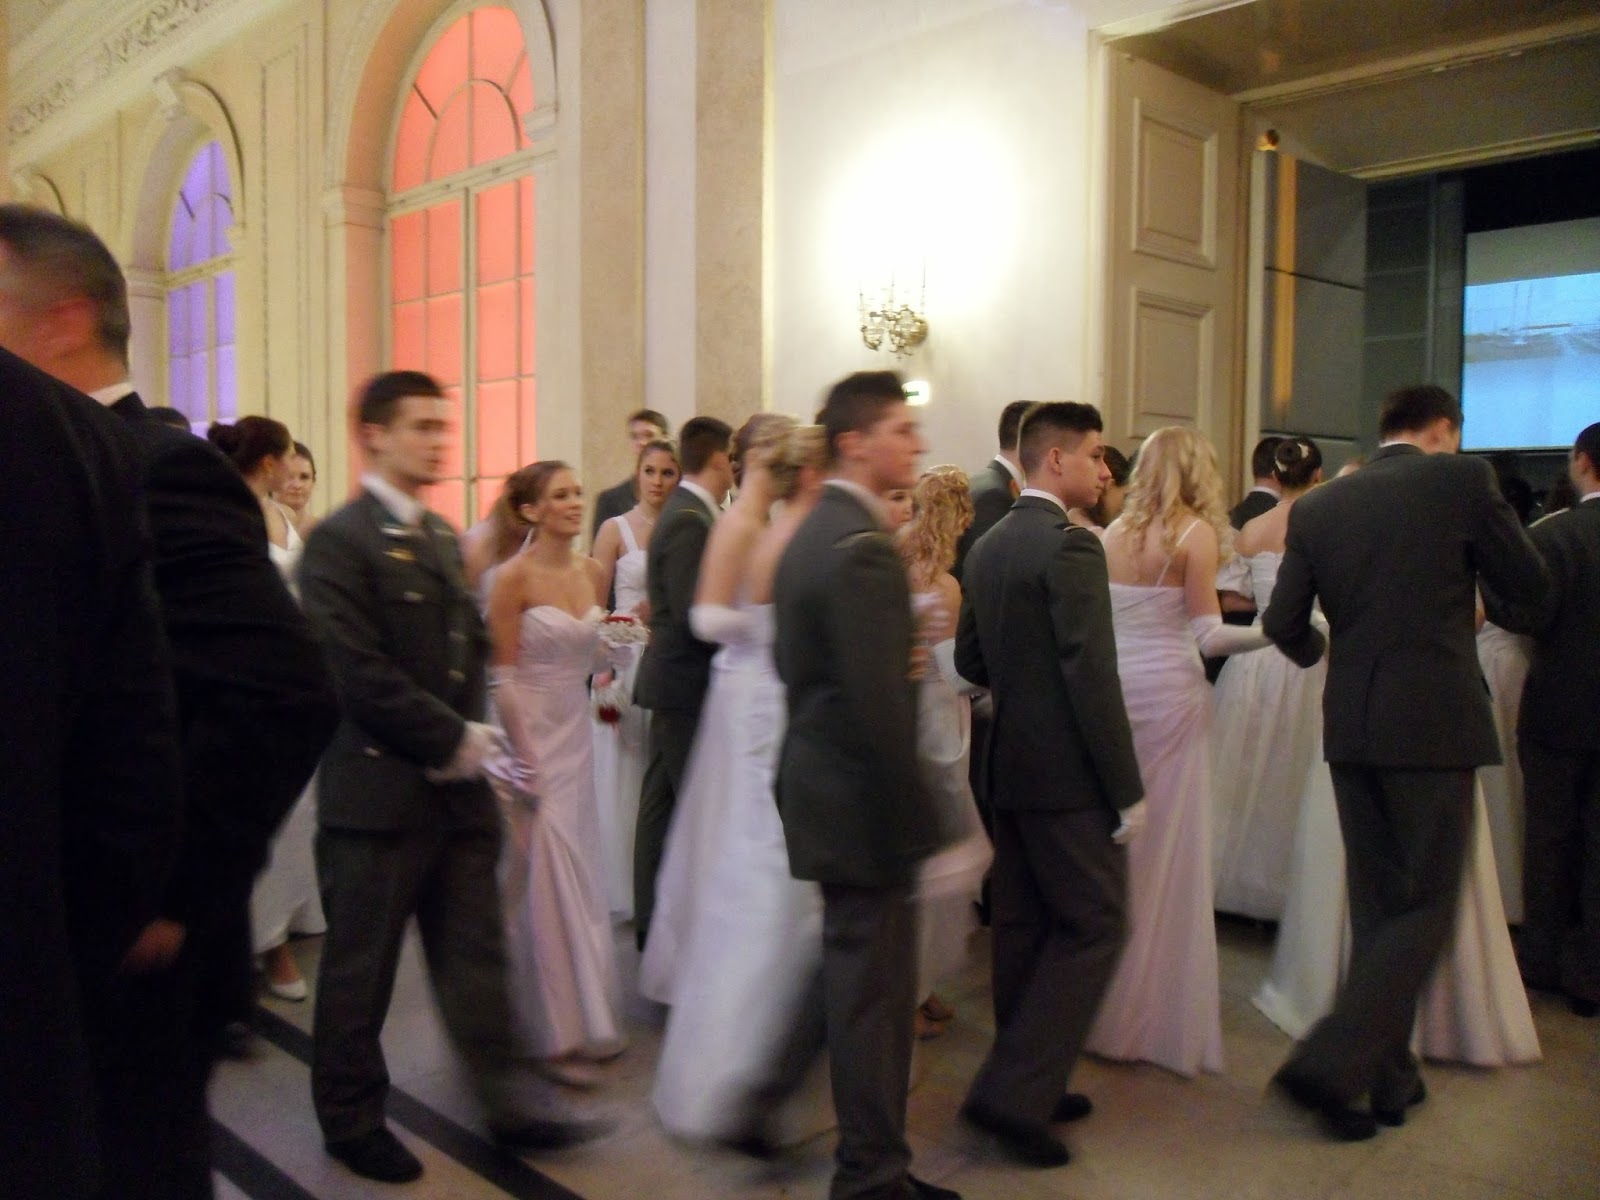
The Debutantes 


Some of Austria's powerful people


"And we waltzed, and had a really, really, really good time"


Can you believe these chandeliers?


My prince charming
This city has so much to offer.  A great subway system (make sure to buy the full pass for the weekend), cute cafe's to relax and enjoy gorgeous architecture, museums, palaces upon palaces, and a great opera house.  Our favorite part of the trip, aside from the ball, was going to the Vienna State Opera.  It is gorgeous, and we were able to enjoy it without shelling out a lot of cash.  It is really nice to have your own box to watch the show, but if you're not sure if you like opera, you can do the standing seats and not feel bad about leaving when you feel like you've had enough. To buy these tickets, go to the middle of the building on the Operngasse side and look for a door to enter.  Then head to the right looking for the sign Stehplatze.  You can buy standing-room tickets for 3 Euro 80 mins before until 20 mins after the curtain time.  If you go early you can save your standing spot by tying a scarf around the rail and then head to the bar for a drink.  This was the best experience ever and so worth it!  We also ate at two wonderful restaurants while we were in town - Mini and 1516 Brewing Company.  Mini does a great pairing of wine with your food and 1516 is a reminder of home because it's a microbrewery.  

Schonbrunn Palace
I want to see the gardens in the Summer!

Vienna sausage-not from a can.  Learned the hard way that the shredded white stuff is not cheese.  Mouth full of pure horseradish = Fail!
 
St. Stephen's Cathedral - Look at that tile roof - gorgeous!


Vienna's taxi service


Yummy beer at 1516

The view from our opera standing-room seats


I'm so happy to report that Vienna has much more to offer than tiny sausages.  Make sure to book your tickets for next year's ball, so you can waltz the night away too!

Here's a video of the music and dancing at the ball.  I wish I looked half as good as these dancers.


Monday, November 18, 2013

Commissary Rewards?!?

*disclaimer:  I was not paid by the commissary rewards program to promote this service.  These experiences and opinions are entirely my own.*

As if there could ever actually be a reward for going to the commissary, right?  Unless you feel rewarded when standing in long lines, weaving through aisles jam-packed with carts, hearing the occasional screaming child (no judgement to all my parents out there...I'll feel your pain one day), or standing in a check out line that resembles Best Buy on black Friday.   We never used the commissary at Ft. Campbell as much as we do now.  I never felt like going through the hassle of driving 20 minutes when Kroger was five minutes from our house.    Now that we are living in Germany the commissary has become my new best friend.  One day when I was spending some quality time with my new BFF in the self check out line, I noticed the Commissary Rewards Cards sitting in a stack.  I had seen a couple of commercials on AFN about the card, so I went home to do some research and see if there were any coupons I would actually use. 

I'm such a bad Army wife.  Am I the last person to find out about this card?

A while back I attempted to play the whole coupon game, but I gave up when I realized I was just buying random things that I never actually would have purchased.  I also didn't have enough dedication to put a whole binder together like some of those savvy couponers out there.  Luckily, the commissary rewards card is so easy to use and has coupons for items you would normally buy. 

I have to admit this is a pretty rewarding view from our commissary.

It's all done online, so you don't have to keep folders for all of your coupons and fumble through them at the check out line.  The card actually stores all of your coupons.  I've seen a few reviews on the card saying that it didn't work when they were in the check out line, so I was a bit reluctant when I used it for the first time.  I asked the cashier to see if it always worked, and he said he has never seen it not work.  Just remember this isn't like other grocery store cards because you have to actually go online and load the coupons you want on your card.

It's pretty amazing.  I even found that one of the items had a paper coupon next to it in the aisle.  I wasn't sure if it would work at check out, but I decided to pick it up and see what happened.  The cashier said sometimes it accepts the coupons and sometimes it doesn't.  It must have been my lucky day because it did! 

The mobile app for this is really well put together.  You can even add coupons to your card while you're shopping.  For example, I remembered I needed batteries while I was shopping.  The mobile app allows you to search for coupons using a brand name, so I tried a few names and found a coupon for $0.50 off.  Score, so easy! 

A few of my commissary rewards:
Fabric freshner:  $0.75 off
Batteries:  $0.50 off
Frozen pie crusts:  Save $1 on 2 
Refrigerated baked goods (because my cookies from scratch suck):  Save $1 on 2 

My favorite reward so far:
Body wash:  Originally $2.99.  CRC coupon $2.  Coupon in aisle $0.50.  I paid $0.49!!!

So, it turns out there is actually something that can give you a rewarding feeling after you make it through the lines.  So, go and pick up your card at your local commissary. Register it online here.   Click all of the coupons that are useful to you.  Then download the mobile app because it's so useful and almost makes it more like a game, not to mention it's something else to do besides check your IG for the 10th time that day (or is that just me? #waytoomuchtimeonmyhands). Good luck friends!  

Did the card work for you?  I'd love to hear your favorite deal and experiences. 


Tuesday, October 1, 2013

Surviving on the same clothing for 101 days!

Can you believe it?  Yes, we have been surviving on the same clothing for 101 days!  More worthy of note is that we left the 101st Airborne Division 101 days ago.  I feel like this is an accomplishment seeing as it did change seasons here in Germany and we thought we’d only be without clothing for at the most 30 days and I carefully calculated the pick-up days of unaccompanied baggage (UB) and our house hold goods (HHG).  UB is flown over earlier, so it will be there close to when you arrive.  I had them pick this up a week after Sam came home from deployment.  Talk about a crazy household.  If you know at all how moving goes, you know this was a mess.  We were up the night before contemplating what to put in the shipment and what not to; including, what to give to Goodwill and what to keep.  We decided to pack all of our clothing, so we would have it early on because, you know, the whole change of season thing that would happen. 


Here's a random picture of a picture of some of the stuff we packed in UB.


Here’s a list, since the pic above is not at all in any kind of order:
Most of our wardrobes
Jackets
Shoes
Scarves
Pots and pans
Dog bed
Dog crate
Dog food bowls
Mop and Broom
Dishes, including glasses
Coffee to-go cups
Tupperware
Baking dishes
Coasters
Pasta strainer
Cutting board
Cooking utensils
Measuring cups
Silverware
Water bottles
Protein shakers
A cook book (because I suck at thinking of recipes)
A workout mat
2 camping chairs (in case we didn’t get loaner furniture – Sam used these when he moved to ft Campbell for a solid month)
Blow up mattress
Trash can

I thought we were doing pretty well that day and it would all be wonderful to have everything from essential clothing items to cleaning supplies.  Plus, since we were moving at high PCS season I was pretty happy with myself that I got a blow-up mattress.  Well, all of my pre-arranged packing and planning is a waste because it has all been sitting in storage since 1 week after we arrived in July.  It should go on the record how amazingly I timed it though.  Our entire contents of our house (HHG) arrived and has been in storage since mid-August.

You : Why are you sitting here complaining about not having any clothing?  Well, it is mainly our fault (when I say mainly, I mean 52%).  When we arrived we thought we would be a shoe-in to live off post.  We (and everyone we talked to) thought for sure that Sam’s job would make us ineligible to stay on post.  We thought, oh we’ll submit and exception to the policy (ETP) and it will get approved and we will be on our merry way looking for housing in this amazing city.  Not the case, we waited 14 days (the time it takes to get the ETP looked at by housing) for a denial letter saying it would be financially irresponsible to place us off post.  We immediately submitted another ETP again citing the issues we thought we’d come across actually did happen within that 14 day period.  And we were still denied another time around.

During that whole time we were staying in the hotel, but when we got the second denial we were forced to take on post quarters.  The first place we looked at was a joke.  It looked like we were living on the courtyard in The Wire.  We both decided we would never be able to actually have visitors there, so we accepted quarters at a different location.  This place is all of 900 sq ft and it will be a miracle if most of our furniture fits without feeling like we are hoarders.  The upside is there is a room in the basement for storage, so all that doesn’t fit can sit down there for 2-3 years.

Okay, so yes, we have accepted our quarters and have been in this place for a month now.  You:  Why haven’t you accepted at least your unaccompanied baggage?  That would seem like the logical thing to do, but we wanted to submit one last ETP, and did you see the list of all the stuff that we packed in UB?  If we accept any of our shipments and are granted to live off post, then we are responsible for moving it to the next location.  So, we’ll say the answer is pure laziness.  I still stand firm that this is 52% our fault.  So, what’s in these glorious bags that we packed 101 days ago?


Yup, we only packed one big suitcase, 2 carry-on sized bags, and 2 backpacks because we thought we would be without UB for only a few weeks.  Don’t you love the backpacks?  We gifted them to ourselves for our European travels.  And we’ve used them already…a lot!  We were even able to get all of the stuff we needed for a week in Paris.  I guess you’re getting to see that I’m not a normal "girl" when it comes to packing, but hey, it was hot out and you only really need sandals in the summer, right? So, here’s a list of everything in those bags:

Me:
3 workout outfits
3 dresses
5 pairs of shorts
3 pairs of jeans
15 shirts (a variation of dress and t-shirts)
1 long sleeve sweater
2 professional dresses (in case I got an interview)
Make-up (duh)
Nail polish (it makes me happy)
2 pairs of sandals
1 pair of running shoes
1 pair of closed toed shoes
1 pair of heels
1 clutch
1 purse
1 jacket

Sam:
1 ACU uniform
Dress blues (in case he had a trial…he’s worn them twice now)
5 work shirts / socks
2 pairs of jeans
1 pair of khakis
2 pairs of shorts
2 workout outfits
10 shirts
2 polos
2 sweaters
1 collared shirt
1 jacket
1 pair of running shoes
1 pair of dress shoes
1 pair of Dress blues shoes
1 pair of flip flops
1 pair of everyday sneakers


Random stuff:
Computer
Camera
Shampoos and conditioners (my hair is very special)
Toiletries
Prescriptions (Make sure to get these before going OCONUS because they can’t transfer them overseas)
Measuring tape (this has come in handy)
3 towels
Dog shampoo
Dog bed
Dog toys

Craziness, right?  I think we are just stellar packers to get all that stuff in those bags.  My picture isn’t exactly accurate because we had one Vera Bradley weekender bag too.  We really haven’t hated our lives too much based on what we brought.  Just wish we had packed a few more warmer pieces of clothing, more church clothes, and dog nail clippers (Emma tore her dew claw the first week we arrived).  And I do laundry on the regular, so Sam can have work clothes. 

A few positive things that came from this experience are that now Emma is trained to stay out of her crate when we leave, I’ve gotten less dependent on a cook book, and the neighbor is really nice and cooks me Brazilian food while I play with her adorable 2 year old. 

We were extremely lucky to have a great sponsor and our friends we met in the beginning who let us borrow stuff when we moved into on post quarters.  They let us borrow things like bedding, pots & pans, and dishes.  I’m not sure how we’ll ever re-pay them.  Even with the help of these amazing people we couldn’t get by without buying some things.  We had to buy a few things including dog nail clippers and a sweater from H&M for me to have another long sleeve option.  

Here’s a few pics of how we’ve been living:

This 13 inch TV with DVD player has been our saving grace.  We got it at the on post Thrift shop for $15.  Score!  Obviously we’re going to donate it back, but we only had to buy an adapter cable and we are able to get 10 free channels from AFN.  We supplement this with DVD’s we borrow from the Wiesbaden library.  We’ve been able to catch-up on New Girl and Community. Since the government has shutdown, our AFN service has also been shutdown, so I see a lot of DVD’s in our future…unless the library shuts down, yikes!  Don’t you love our dual-usage of Emma’s crate?  Classy, I know.


This blue throw is doubling as our curtains in our bedroom.  My thrifty side couldn’t imagine buying new curtains, since we have ~1000 pairs.  So, I opted for this throw blanket that we could use later as an accent in our guest bedroom.


It looks pretty bad, but don’t you think it will look great on this bed?


The movers forgot to pack this, but in hindsight it's a major plus because it makes it feel like home.


I HAD to buy these pillows, because I’ve been looking for this ikat pattern everywhere and these colors match our living room décor.  They were marked down to an astonishing price of only 8 Euros.  Can you believe it?  I even contemplated making my own pillows last year but even Hobby Lobby didn’t carry the fabric.  Who knew I just needed to move to a whole new country to find them.  Don’t you love them?  This store is amazing, and I will be doing a blog about it eventually.  For now these beauties have been making the loaner furniture that much more comfy.


This vacuum has saved my sanity.  I don't even have kiddos like you, Jenn.  One thing I can’t stand is stuff on my feet.  So, I end up using this item all. the. time.


We were invited to a Great Gatsby party, and since we didn’t bring our 1920’s attire with us, we had to go out and buy a new black dress and suit.  Sorry, for the mirror pic, but doesn’t he look dapper?


We went to Durkheim's Wurstmarkt wine fest and definitely needed some dirndl and lederhosen for that event.  We wore them again this past weekend for an Oktoberfest party, and we’ll get more use out of them this weekend for the real Oktoberfest in Munich. Probably our best buy yet!  This is just a preview of our outfits....


Luckily it's Oktoberfest season, so we might get by just wearing our lederhosen and dirndl on a regular basis.


Related Posts Plugin for WordPress, Blogger...